


Step-by-Step: How to Achieve the Perfect Smokey Eye
Achieving the perfect smokey eye is an art and a science, a combination of technique, color choice, and application that transforms your look from everyday to extraordinary. Whether you’re heading out for a night on the town, attending a special occasion, or simply want to elevate your everyday makeup routine, mastering the smokey eye can be a game-changer. In this article, we will break down the process in a step-by-step guide, complete with tips, tools, and techniques that will help you create a stunning smokey eye, regardless of your skill level.
Understanding the Smokey Eye
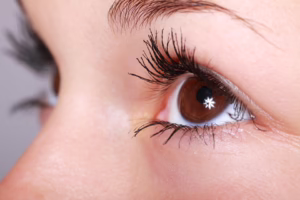
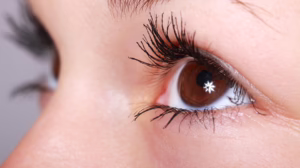
Before diving into the application process, it’s essential to understand what a smokey eye is. Typically characterized by a sultry blend of dark eyeshadows, a smokey eye features a gradient effect that seamlessly transitions from dark shades in the crease to lighter shades on the lid. The overall effect is dramatic yet versatile, allowing for various interpretations depending on your preferences.
Choosing Your Colors
The traditional smokey eye usually employs blacks and grays, but you can get creative with shades like browns, purples, navy blues, or even vibrant colors for a more contemporary take. Here’s a quick guide to color selections:
- Classic Black and Gray: Timeless and elegant, perfect for formal events.
- Warm Tones (Browns, Coppers): Great choice for daytime or softer looks.
- Cool Tones (Blues, Purples): Adds a pop of color while maintaining that sultry effect.
Step 1: Gather Your Tools
To create the perfect smokey eye, you’ll need a selection of tools and products:
Eyeshadow Palette
Opt for a palette with at least three complementary colors: a dark shade, a medium shade, and a light highlight color.
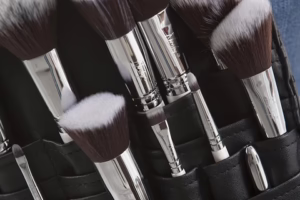
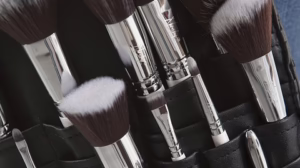
Brushes
- Flat Shader Brush: For packing color onto the eyelid.
- Blending Brush: For seamless blending.
- Pencil Brush: For detailed work in the crease and under the eye.
- Angled Brush: Great for applying eyeliner or detailed work.
Primer
Use an eye primer to ensure that your eyeshadow stays in place and the colors pop.
Eyeliner
Choose between pencil, gel, or liquid eyeliner. A gel or pencil formula often works best for the smokey eye look.
Mascara
A volume-enhancing mascara will help open up the eyes.
Step 2: Prepare Your Eyes
Before applying any makeup, it’s crucial to prepare your eyelids properly.
Clean Your Lids
Start with clean, dry eyelids. You can gently wash your face with a mild facial cleanser or use makeup wipes to remove any leftover product.
Apply Eye Primer
Using your finger or a small brush, apply a thin layer of eye primer all over your eyelid, from the lash line to the brow bone. This step helps to create a smooth base for your eyeshadow and enhances its longevity and vibrancy.
Step 3: Base Color Application
Apply the Dark Shade
Using a flat shader brush, dip it into the darkest shade of your chosen palette. Pack this color onto the eyelid, focusing on the outer third and working your way inwards. You want to create a solid base for your gradient look.
Blend with the Medium Shade
Switch to a clean blending brush and pick up the medium shade. Start blending the edges of the dark shade, using light circular motions. The key to a smokey eye is blending, so spend some time on this step to avoid harsh lines.
Step 4: Define the Crease
Adding Depth
Take the darkest shade again on a pencil brush and apply it to the crease of your eyelid. This adds depth and dimension to your look. Remember to keep your eyes relaxed and open as you apply it, so you can see where the crease falls naturally.
Blend, Blend, Blend
Use your blending brush again to blend the crease color into the medium shade, ensuring there are no harsh lines. The transition should appear seamless.
Step 5: Lower Lash Line
Connect the Top and Bottom
To give your smokey eye a more cohesive look, you’ll want to add color to your lower lash line. Start with the medium shade on a pencil brush and apply it from the outer corner to the inner corner of your lower lash line.
Darken the Outer Corner
Next, take the dark shade on the same pencil brush and apply it only to the outer third of your lower lash line. Blend it gently into the medium shade to create a smooth gradient.
Step 6: Highlight and Brighten
Inner Corner and Brow Bone
Using a small flat brush, apply the lightest shade from your palette to the inner corner of your eyes to brighten up the look. This step is crucial in making your eyes appear larger and more awake.
Brow Bone Highlight
Apply the same light shade under the brow bone to lift the brow and soften the overall appearance of your smokey eye.
Step 7: Eyeliner
Tightlining
Using gel or pencil eyeliner, tightline your upper waterline. This helps to define the lash line without visibly visible liner, adding to the fullness of your lashes.
Create a Wing (Optional)
If you desire a more dramatic look, you can create a wing using the eyeliner. Extend the liner slightly beyond the outer corner of your eye, then connect it back towards the lash line.
Step 8: Mascara
Apply Generously
Finish off your eye look by applying several coats of volumizing mascara on your upper and lower lashes. Don’t shy away from layering; the more mascara, the better for a smokey eye look.
False Lashes (Optional)
If you want to take your smokey eye to the next level, consider adding false lashes. They enhance the drama and make your eyes pop even more.
Step 9: Finishing Touches
Inspect and Clean-Up
Once you’ve completed your eye makeup, take a step back to inspect your work. Check for any fallout from the eyeshadow and clean it up with a makeup wipe or cotton swab dipped in makeup remover.
Setting Spray
To ensure your smokey eye stays in place all night long, use a makeup setting spray. Just a few spritzes over your completed makeup will keep everything fresh and intact.
Pairing with the Rest of Your Makeup
When you have such a bold eye, it’s usually best to keep the rest of your makeup simple. Opt for a nude or soft pink lip to balance the look.
Conclusion
Creating the perfect smokey eye doesn’t have to be an intimidating task. With practice, patience, and the right tools, anyone can master this stunning look. Remember, the key to a beautiful smokey eye is blending, so take your time with each step. Experiment with different colors and styles to find what best suits you. Whether you’re preparing for a night out or just want to feel fabulous, a smokey eye can elevate any look.
This guide, complete with step-by-step instructions and illustrations for each phase, serves as a comprehensive roadmap to achieving the perfect smokey eye. As you practice and refine your technique, don’t forget to have fun with it—makeup is ultimately a form of self-expression!


Add Comment