


DIY Nail Designs: Tips and Tricks for Gorgeous Nail Art at Home
Nail art has transcended mere aesthetics to become a significant form of self-expression for many individuals. The beauty industry has witnessed an explosion in the popularity of creative nail designs, making it easier than ever for people to showcase their artistic flair. Whether you’re a beginner or a seasoned nail art enthusiast, creating beautiful designs at home is both fun and fulfilling. This article provides an in-depth look at DIY nail designs, offering tips and tricks to help you elevate your nail game to the next level.
The Basics of Nail Art
Understanding Nail Anatomy
Before diving into the art and techniques, it’s helpful to understand the anatomy of the nail. The nail plate is the hard part that adheres to the nail bed, and it’s covered by a protective layer of skin called the cuticle. Keeping these areas healthy is crucial for achieving a beautiful nail design.
Essential Tools and Supplies
To get started, gather the following essential tools:
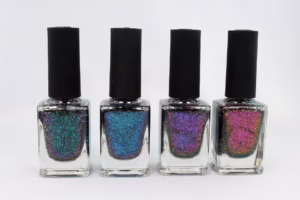
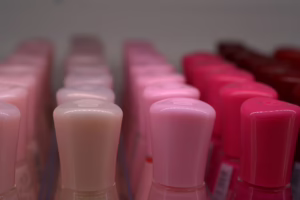
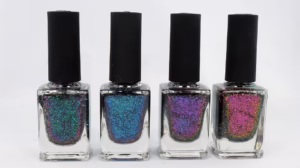
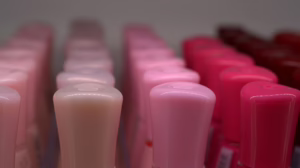
- Nail Polish: Invest in a base coat, top coat, and a variety of colors.
- Nail Art Brushes: These come in various sizes for detailed designs.
- Dotting Tools: Useful for creating polka dots or intricate details.
- Striper Tape: Perfect for clean lines and geometric designs.
- Sponge: Ideal for gradient techniques.
- Rubbing Alcohol or Nail Polish Remover: For cleaning brushes and fixing mistakes.
Nail Preparation
Preparation is critical for any nail design. Follow these steps:
- Clean Your Nails: Remove old polish and wash your hands thoroughly.
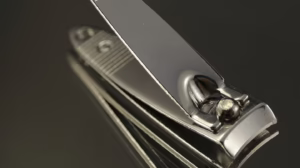
- Shape Your Nails: Use a nail file to shape your nails according to your preference—square, oval, or stiletto.
- Push Back Cuticles: Gently push back your cuticles to create a clean canvas.
- Apply a Base Coat: This protects your nails and helps the polish adhere better.
Techniques and Design Ideas
Having the right tools and preparation is half the battle. Now it’s time to explore various techniques and designs you can try at home.
1. Basic Color Blocking
Color blocking is simple yet effective. Choose two or three contrasting colors and apply them to different sections of the nail.
- Tip: Use tape to section off different areas for clean lines.
2. Ombre Nails
Ombre nails provide a gradient effect that can be achieved with a sponge.
- Steps:
- Apply a base color and let it dry.
- Use a sponge to apply a second color, dabbing it onto the nail to create the gradient.
- Finish with a top coat for a smooth finish.
3. Polka Dots
Polka dots are a classic nail design that’s easy yet playful.
- Technique:
- After your base color has dried, use a dotting tool to create dots in a contrasting color.
- Vary the sizes for a fun, whimsical look.
4. Striped Nails
Stripes can be done with striping tape or a thin brush.
- Method:
- Apply a base coat.
- Use striping tape to create the desired pattern and paint over it.
- Remove the tape while the polish is wet to get clean lines.
5. Floral Designs
Floral designs are perfect for spring and summer.
- How To:
- Start with a solid base color.
- Use a small brush to create petal shapes with a contrasting color.
- Add small dots for the flower centers.
6. Marble Effect
A marble effect can be achieved using the water marble technique.
- Steps:
- Fill a bowl with water and drop in nail polish colors.
- Use a toothpick to swirl them together.
- Dip your nail into the water, making sure to pull it out swiftly.
7. Glitter Accent Nails
Adding glitter can elevate any design.
- Tip: Use glitter polish as an accent on one or two nails, while keeping the rest a solid color for balance.
8. Seasonal Designs
Seasonal themes are fun for celebrating holidays.
- Halloween: Use black and orange with spider or pumpkin designs.
- Christmas: Go for red and green, with snowflakes and Christmas trees.
- Valentine’s Day: Think pinks and reds with hearts and love letters.
Safety and Maintenance
Nail Care
Healthy nails serve as the foundation for any nail art. Follow these tips:
- Hydration: Keep your cuticles moisturized with oils or creams.
- Limit Exposure: Avoid prolonged exposure to nail polish remover.
- Breaks: Give your nails a break from polish occasionally to prevent damage.
Nail Art Remover
Invest in a good-quality nail polish remover. Acetone works but can be harsh on your nails, so consider a non-acetone alternative if you’re removing glitter or gel polish.
Best Practices for Long-Lasting Nail Art
To ensure your designs last, follow these best practices:
- Thin Coats: Apply multiple thin coats rather than one thick coat.
- Top Coat: Always seal your nail art with a good top coat. This adds shine and extends the life of your design.
- Drying Time: Allow adequate drying time between layers.
Troubleshooting Common Issues
Polish Bubbling
Polish bubbling can be frustrating. This usually occurs due to applying too thick of a layer or working in a humid environment.
- Solution: Always use thin layers and allow proper drying time.
Chipped Nails
Chipping is another common issue.
- Prevention: Use a good base and top coat, and avoid using your nails as tools.
Streaky Color
Streaks can happen with certain polishes.
- Solution: Look for high-quality nail polishes that provide even coverage, and don’t forget to shake the bottle well before use.
Creative DIY Nail Design Ideas
Abstract Art
For the avant-garde, try abstract designs. Use a mix of colors and shapes to create unique pieces on each nail.
Geometric Patterns
Use tape to create sharp geometric patterns. This skill requires patience but can produce stunning results.
Animal Prints
Animal prints like leopard or zebra stripes can add an exotic touch to your nails.
Nail Art Pens
Nail art pens provide the precision needed for intricate designs. They are perfect for writing or details but require steady hands.
Learning Resources
Online Tutorials
- YouTube and Instagram have a wealth of tutorials showcasing various techniques and styles. Following popular nail artists can provide inspiration and education.
Nail Art Books
Books specifically focused on nail art can be excellent resources, offering step-by-step guides and advanced techniques.
Conclusion
DIY nail designs can be a rewarding and enjoyable way to showcase your personality and artistic flair. With the right tools, techniques, and a bit of practice, you can achieve professional-looking nail art in the comfort of your own home. Whether you prefer bold colors, intricate designs, or simple elegance, the possibilities are endless. So gather your supplies, unleash your creativity, and get started on your DIY nail art journey!
Footnotes
- Smith, K. (2022). “The Science of Nail Polish: Understanding Formulation.” Nail Science Journal.
- Johnson, L. (2023). “Nail Care Tips for Healthy Nails.” Beauty & Wellness.
- Roberts, M. (2021). “Top Trends in Nail Art.” Nail Design Magazine.
- Thompson, D. (2023). “Essential Tools for DIY Nail Art.” Craft Your Nails Journal.
- White, R. (2022). “Nail Art Techniques: From Beginner to Pro.” Creative Nails.
- Clark, F. (2021). “Seasonal Nail Art Ideas.” Nail Art Inspirations.
References
- Jones, S. (2023). Nail Art Handbook: Step by Step Techniques. New York: Nail Publishing.
- Adams, T. (2021). DIY Beauty: Home Tips for Fabulous Nails. London: Beauty Press.
Creating stunning nail designs at home is an art form that can be mastered with patience and creativity. Use the information and tips provided in this article to transform your nails into beautiful canvases. Happy designing!


Add Comment