


Textures and Techniques: Elevate Your Nail Game!
Nail art has evolved drastically over the years, transforming from simple polish to a multi-faceted art form that incorporates a vast array of textures and techniques. In this article, we delve into various textures and methods that can elevate your nail game, ensuring your nails are not just polished but a canvas for creativity.
Understanding Nail Textures
Nail textures refer to the various surface finishes that can be achieved on your nails. These textures add dimension, interest, and character to your nail art, making it a vital component of modern nail design. Below are some popular textures you might consider when creating your next nail art masterpiece.
1. Matte Finish
Matte nails have gained immense popularity over the past decade due to their sophisticated and modern look. This texture can be achieved using matte topcoats or polishes specifically designed to dry with a non-shiny finish.
Application Technique:
- Base Coat: Always start with a base coat to protect your nails.
- Color Application: Apply one or two coats of your chosen nail color for a more solid base.
- Matte Top Coat: Finish with a matte top coat to achieve that velvety look.
Tip: To avoid streaks, apply the matte top coat in smooth, even strokes.
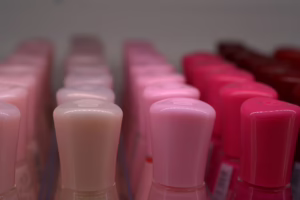
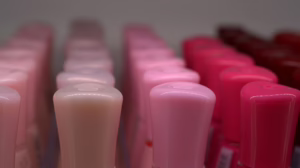
2. Glossy Finish
On the contrary, a glossy finish offers a different appeal with its shiny, reflective surface. Glossy nails create an elegant and polished look that’s perfect for any occasion.
Application Technique:
- Base Coat: Start with a base layer for protection.
- Color Application: Apply your favorite polish in one or two coats for vibrancy.
- Glossy Top Coat: Apply a glossy top coat to enhance shine and longevity.
Tip: High-quality top coats can last longer and prevent chipping, so invest in a good one.
3. Textured Polish
Textured polishes are designed to have a rough or uneven surface. Brands like OPI and Essie offer textured polishes that resemble sand or are glittery and bumpy.
Application Technique:
- Base Coat: Always apply a base coat to prep the nails.
- Texture Polish: Apply one or two coats of the textured polish directly onto the base coat.
- Top Coat (Optional): Depending on the desired look, you may choose to leave the texture polish without a top coat for added texture or seal it for a mixed finish.
4. 3D Elements
Incorporating 3D elements into your nail art can transform simple designs into a stunning, multidimensional affair. These can include embellishments such as rhinestones, studs, or beads.
Application Technique:
- Base Coat: Always prep with a base coat.
- Color Application: Apply your nail color.
- Embeds: While the color is still wet, carefully place your 3D elements onto the design.
- Top Coat: Seal everything with a top coat to keep the decorations intact.
Tip: Use nail glue for heavier embellishments to ensure they stay put.
Unique Nail Techniques
Beyond textures, various techniques can refine your nail art and introduce new styles. Let’s explore some methods that will undoubtedly enhance your skills.
1. Ombre Nails
Ombre nails blend two or more colors to create a gradient effect. This technique offers a fun yet elegant look.
Application Technique:
- Base Coat: Start with a base coat.
- Base Color: Apply your primary color as a base.
- Gradient Application: Use a makeup sponge to dab on the second color, blending it into the first.
- Top Coat: Finish with a top coat to smooth the gradient and add shine.
2. Negative Space
This technique allows the natural nail to show through the nail art design, creating a modern and chic look.
Application Technique:
- Base Coat: Apply a base coat.
- Design Application: Use striping tape or nail art brushes to create patterns and then paint over them with color. Remove the tape before the polish dries to reveal the negative space.
- Top Coat: Seal everything for durability.
3. Marbling
Marbled nails give a stunning illusion of swirling colors, mimicking marble stone. This technique is both artistic and visually appealing.
Application Technique:
- Base Coat: Always begin with a base coat.
- Water Marble: Drop different nail polish colors onto a cup of water and use a wooden stick to swirl them together. Dip your nails into the water to grab the design.
- Clean Up: Use tape around your nails to make cleanup easier.
- Top Coat: Seal with a top coat for the final touch.
4. Stamping
Nail stamping allows you to create intricate patterns without the painstaking effort of freehand painting. Stamping plates come engraved with various designs that can be transferred onto the nail.
Application Technique:
- Base Coat: Always prep your nails with a base coat.
- Color Application: Apply the base color.
- Stamping: Use a special nail polish with a stamping plate and scraper to transfer the design. Press the stamper onto your nail to imprint the design.
- Top Coat: Seal with a top coat for longevity.
5. Foil Accents
Nail foils can add glamour and shine to any design. They are easy to apply and come in various colors and patterns.
Application Technique:
- Base Coat: Always prep with a base coat.
- Color Application: Apply your base color.
- Foil Application: Use adhesive foil glue where you want the foil to stick. Once it’s tacky, apply pieces of foil onto the nail.
- Top Coat: Seal with a top coat to secure the foil.
Choosing the Right Tools
To achieve these techniques, having the right tools is crucial. Here are essential tools for any nail art enthusiast:
1. Nail Brushes
Invest in high-quality nail art brushes of various sizes—fine tips for detailed designs and larger brushes for filling spaces.
2. Dotting Tools
Dotting tools allow you to create dots and intricate designs easily. They come in various sizes, making them versatile for any nail design.
3. Nail Tape
Nail tape can create straight lines and design boundaries, perfect for negative space or geometric designs.
4. Sponges
Makeup sponges are essential for gradient and ombre techniques.
5. Nail Stamping Kits
These kits typically come with plates, a stamper, and a scraper, making it easier to transfer designs onto your nails.
Nail Care Maintenance
Having impressive nail art is one thing, but maintaining healthy nails is equally essential. Here are some tips for nail care:
1. Hydration
Keep your nails and cuticles hydrated by using cuticle oil regularly. This prevents breakage and promotes growth.
2. Proper Removal
When it’s time to change your nail design, use acetone or non-acetone remover to take off the polish gently. Avoid peeling or picking at your nails.
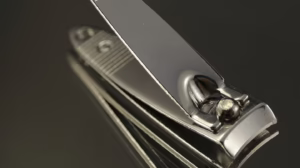
3. Regular Trims
Regular trimming helps maintain nail health and prevents snags. Always use sharp nail clippers or scissors designed for nails.
4. Base and Top Coats
Always apply a base coat when using nail polish to protect your nails from staining. A top coat helps in sealing the design and preventing chipping.
5. Balanced Diet
Nutrition plays a vital role in nail health. Consume a balanced diet rich in vitamins and minerals to promote stronger nails.
Nail Art Inspirations
Feeling stuck? Here are some trendy ideas to spark your creativity:
-
Floral Designs: Perfect for spring or summer, floral designs grab attention and are versatile.
-
Animal Print: Leopard spots or zebra stripes can add edginess to your nails.
-
Geometric Patterns: Triangles, lines, and polygons can create stunning visual contrast.
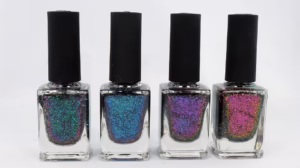
-
Galaxy Nails: Incorporate deep blues, purples, and sparkles for a cosmic effect.
-
Holiday Themes: Celebrate seasons or holidays with thematic nail art like pumpkins for Halloween or snowflakes for winter.
Final Thoughts
Nail art allows for self-expression and creativity. With the right techniques, textures, and tools, you can elevate your nail game significantly. Whether you aim for a sleek, minimalist look or intricate designs, the possibilities are endless. By investing time in learning new techniques and experimenting with different textures, you can create nail designs that are not only beautiful but also uniquely yours.
So grab your tools, unleash your creativity, and get ready to transform your nails into stunning masterpieces that reflect your personal style!
References
[1] Expert recommendations from nail technicians and artists who specialize in modern nail techniques. [2] Interviews with salon owners on the latest trends in nail art and care. [3] Nails Magazine for industry updates and nail art inspiration.By focusing on the right textures and techniques, anyone can master the art of nail design, making it a fun and rewarding hobby or profession. Whether you are prepping for an event or simply expressing yourself, elevate your nail game and let your creativity shine through!


Add Comment