


Nail Design for Beginners: Simple Steps to Stunning Results
Nail art has become a popular form of self-expression, allowing individuals to showcase their creativity and style right at their fingertips. For beginners, the world of nail design can be both exciting and overwhelming. Fortunately, with the right guidance and tools, anyone can create stunning nail art. This article will provide a step-by-step approach to nail design, including essential tips, techniques, and inspirational ideas to help you embark on your nail artistry journey.
Understanding the Basics of Nail Design
Before diving into nail design, it’s essential to understand some basic concepts. Nail design typically involves several elements, including:
-
Nail Shapes: The shape of the nail can dramatically alter the overall design. Common shapes include square, round, almond, coffin, and stiletto.
-
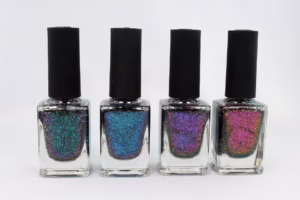
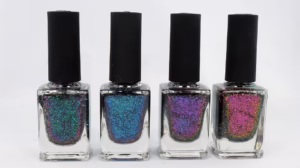
Types of Nail Polish: There are various types of nail polish including cream, glitter, matte, and gel. Each type adds a different finish and texture to your designs.
-
Tools and Supplies: Familiarizing yourself with the necessary tools like brushes, dotting tools, tape, and sponges will prepare you for a range of techniques.
Essential Tools and Materials
1. Nail Polish
Invest in a basic set of nail polishes that include:
- A base coat
- Various colors
- A topcoat
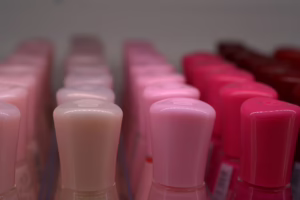
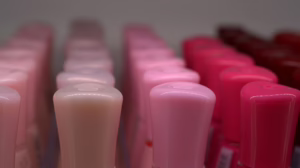
You can start with classic colors like red, pink, and nude, then expand your collection to include more vibrant and pastel shades.
2. Brushes and Tools
Having the right tools can make a significant difference in your nail art. Consider including:
- Detailing Brush: For intricate designs.
- Dotting Tool: For creating dots and patterns.
- Striping Tape: For clean lines and patterns.
- Makeup Sponge: Useful for gradient designs.
3. Nail Care Products
Healthy nails are the foundation for beautiful nail art. Make sure to have:
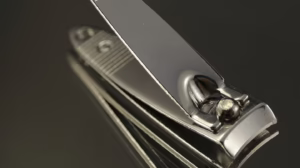
- Nail file
- Cuticle oil
- Hand cream
Basic Nail Prep
Before applying any nail polish, it’s crucial to prepare your nails properly. Follow these steps:
- Remove Old Nail Polish: Use a gentle nail polish remover.
- Shape Your Nails: File your nails to your desired shape and length.
- Push Back Cuticles: Use a cuticle pusher to gently push back the cuticles for a neat finish.
- Buff the Nails: Lightly buff the surface of your nails for better polish adhesion.
- Clean the Nails: Wipe your nails with a cotton ball soaked in polish remover to remove oils.
Applying the Base Coat
The base coat is essential for protecting your nails and ensuring that your polish adheres well. Apply a thin layer of the base coat and let it dry completely before moving on to color.
Simple Nail Designs for Beginners
Now that you are familiar with the basics of nail design, let’s explore some beginner-friendly designs that are easy to master yet stunning in appearance.
1. Solid Color Nails
The simplest form of nail art is applying a solid color.
- Steps:
- Apply a base coat.
- Choose your desired polish color and apply two coats for opacity, allowing each layer to dry in between.
- Finish with a topcoat for shine and longevity.
2. French Manicure
Classic and elegant, a French manicure is a timeless style that is not only chic but also easy to achieve.
- Steps:
- Apply a base coat and let it dry.
- Paint the entire nail with a nude or pale pink polish.
- Once dry, use white polish to paint the tips of your nails.
- Clean up the edges if needed and finish with a topcoat.
3. Polka Dots
Polka dots are playful and can be customized with various colors.
- Steps:
- Start with a base coat and your chosen color.
- Once dry, use a dotting tool to create dots of another color on your nails.
- Vary the size and arrangement for a more dynamic look.
- Seal with a topcoat.
4. Striped Nails
Striped designs can be achieved using striping tape for perfectly straight lines.
- Steps:
- Apply a base color and let it dry completely.
- Use striping tape to create your desired pattern on the nail.
- Apply a contrasting color over the tape and let it dry.
- Once dry, carefully peel off the tape and finish with a topcoat.
5. Gradient Effect
A gradient nail design adds an eye-catching transition of colors.
- Steps:
- Prepare your nails with a base coat.
- Select two complementary colors.
- Using a makeup sponge, apply both colors side by side, then dab the sponge onto your nails for a blended look.
- Finish with a topcoat to smooth out the gradient.
6. Flower Nail Art
Floral designs can be as simple or complex as you want them to be.
- Steps:
- Start with a base coat and your chosen background color.
- Using a detailing brush or dotting tool, create flower petals with a different color.
- Add small dots in the center for accents.
- Seal your design with a topcoat.
7. Color Blocking
Color blocking involves using sharp lines and contrasting colors to create visual interest.
- Steps:
- Apply a base coat and your first color choice, letting it dry.
- Use striping tape to section off portions of your nails.
- Paint the exposed sections with a second color.
- Once dry, carefully remove the tape and finish with a topcoat.
Tips for Successful Nail Design
-
Practice Makes Perfect: Nail art requires practice. Don’t be discouraged if your first few attempts don’t turn out perfectly.
-
Work in Good Lighting: Ensure that you are working in well-lit conditions for better precision.
-
Take Your Time: Rushing can lead to mistakes. Allow time for drying between layers.
-
Use Quick-Dry Products: If you’re impatient, consider using fast-drying topcoats or quick-dry drops to speed up the process.
-
Stay Organized: Keep your tools and supplies organized to make the nail art process more enjoyable.
Advanced Techniques for Aspiring Nail Artists
Once you feel comfortable with the basics, you may want to explore more advanced techniques in nail design. Here are a few methods:
1. Stamping
Nail stamping is a fun way to create intricate designs without freehand skills.
- What You Need:
- Stamping plates with design patterns
- A scraper tool
- A stamp
- Steps:
- Apply a base coat and your choice of polish.
- Select a design from the stamping plate and apply polish over it.
- Scrape off excess polish and then press the stamp onto your nail.
2. Water Marble
Water marbling creates beautiful swirls and patterns.
- What You Need:
- A shallow bowl of room temperature water
- Two or more colors of polish
- Steps:
- Drop different colors of polish into the water, allowing them to spread.
- Use a toothpick or pin to create swirling designs.
- Dip your nail into the water, ensuring to catch the design.
- Clean around your nails with a brush and finish with a topcoat.
3. Foil Application
Nail foils can add a metallic shine and unique effects.
- What You Need:
- Nail foil
- Foil adhesive
- Steps:
- Apply a base coat and a base color of polish.
- Once dry, apply foil adhesive where you want the foil.
- Apply the foil while the adhesive is tacky and seal with a topcoat.
Nail Art Inspiration
Finding inspiration is key to developing your own style. Here are several sources to explore:
- Social Media: Platforms like Instagram and Pinterest are filled with nail art accounts that showcase a variety of designs.
- Nail Art Books: Many books feature step-by-step tutorials suited for beginners to advanced artisans.
- YouTube Tutorials: Video tutorials can help visualize the techniques and provide tips from experienced artists.
Conclusion
Nail design is a rewarding hobby that allows for personal expression and creativity. With patience and practice, anyone can learn to create stunning nail art. Whether you stick to simple designs or venture into more complex techniques, the journey will be enjoyable and fulfilling. Gather your tools, explore different styles and techniques, and remember to have fun along the way!
By following these guidelines and suggested designs, you’ll be well on your way to mastering the art of nail design, regardless of your skill level. Don’t forget the most important part—enjoy the creative process!


Add Comment