


Beyond the Salon: The Best Haircut Tutorials You Can DIY
In a world where self-care and personal grooming have been revitalized, the DIY haircut trend has surged to the forefront, empowering individuals to take control of their hair. With the rise of social media platforms, particularly TikTok and Instagram, countless tutorials have emerged, making it easier than ever to achieve professional-looking haircuts at home. This article delves into the best DIY haircut tutorials available online, providing detailed steps, tips, and necessary tools for mastering various styles.
The Rising Popularity of DIY Haircuts
In recent years, especially amidst the global pandemic, many have turned to DIY haircuts as a necessity rather than a luxury. The closure of salons led people to experiment with their own hair, often with surprising success. This shift reflects a broader cultural trend towards self-empowerment and creativity in personal grooming[1].
Essential Tools for DIY Haircuts
Before diving into specific tutorials, it’s crucial to equip yourself with the right tools. Here’s a basic list of what you’ll need:
- Sharp Hair Cutting Scissors: A good pair of hair scissors is essential. Avoid using regular household scissors, as they can damage hair.
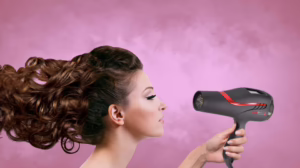
- Clippers (for short styles): If you’re opting for a buzz cut or shorter styles, hair clippers can be really handy.
- Comb: A fine-toothed comb helps in sectioning your hair and ensuring an even cut.
- Hair Clips: These will help hold back sections of hair that you’re not currently cutting.
- Mirror setup: Ideally, have two mirrors (one in front and one behind) to see the back of your haircut clearly.
- Spray bottle: Keeping hair damp can make cutting easier and more controlled.
With the right tools in hand, you’re ready to explore various haircutting styles.
1. The Classic Bob
Step-by-Step Tutorial
- Prep Your Hair: Start with clean, damp hair. Comb out any knots.
- Section Your Hair: Divide your hair into three sections: left, right, and back. Clip aside the left and right sections.
- Cut the Back Section: Take the back section and pull it into a low ponytail. Decide on the length you want and cut straight across, using the ponytail as a guide.
- Layer the Front Sections: Unclip one of the front sections. Pull it straight down and use the back length as a guide. Cut at an angle, slightly longer than the back, to achieve a layered effect.
- Check for Evenness: Comb through your hair and check the cut. Make adjustments as needed, ensuring both sides are even.
Tips
- Take your time! It’s easy to go too short if you’re in a hurry.
- Use the point-cutting technique for a softer edge on the ends.
2. The Long, Layered Cut
Step-by-Step Tutorial
- Prep Your Hair: Start with damp hair. Apply a leave-in conditioner to protect and make cutting easier.
- Create a Center Part: Use a comb to create a clean center part, then section your hair into two halves.
- Cut the Length: Taking one side, hold the hair at the desired length and cut straight across. Do the same for the other side.
- Add Layers: To create layers, twist a section of hair and cut at an angle to soften the ends.
- Check for Balance: Ensure that both sides are balanced by bringing sections together and checking length against each other.
Tips
- Use a razor for added texture if you feel comfortable.
- Consider your face shape when determining the length of bangs or framing layers.
3. Bangs: The Instant Transformation
Bangs are an excellent way to change your look without a complete overhaul.
Step-by-Step Tutorial
- Segment the Hair: Section off the hair you want for bangs. The wider the section, the thicker the bangs.
- Determine Length: Pull the section down and decide how long you want the bangs. Remember, they will spring up once cut!
- Cutting Method: Use scissors or a razor to cut. For a softer look, cut into the bangs vertically rather than straight across.
- Blend with Surrounding Hair: Cross-check the length of the bangs with the longer sections of hair, making adjustments as necessary.
Tips
- If unsure, start with longer bangs; you can always cut them shorter.
- Consider face shape and hair texture when deciding on fringe style.
4. The Shag Haircut
The shag haircut incorporates layers and texture, making it a stylish yet low-maintenance option.
Step-by-Step Tutorial
- Prep Your Hair: Start with damp hair and part it down the middle.
- Create a Triangle Section: From the crown to the temples, create a triangle section on each side.
- Cut the Triangle: Cut the triangle at the desired length. This will be your shortest layer.
- Layer the Sides: Take horizontal sections from the sides and cut them to blend into the shorter middle layer.
- Texturize the Ends: Use point-cutting to remove bulk and add texture at the ends.
Tips
- Keep your haircut fun and carefree: avoid making it too sleek.
- Add some texturizing spray for that quintessential shaggy look.
5. The Pixie Cut
The pixie cut is a bold choice that can showcase your facial features beautifully.
Step-by-Step Tutorial
- Prep Your Hair: Start with dry, clean hair.
- Section Off the Hair: Use clips to separate the top layers from the lower ones.
- Cut the Back: Start with the back, using clippers or scissors to cut to the desired length.
- Cut the Sides: Gradually work your way up to the sides, cutting shorter sections towards the front.
- Texturize the Top: Make the top fun by texturizing it with point cuts for added dimension.
Tips
- Use pomade or styling cream for an edgy finish.
- Regular trims are essential to maintain the shape.
6. The Buzz Cut
The buzz cut is the simplest DIY haircut, requiring no scissor skills at all.
Step-by-Step Tutorial
- Prep Your Tools: Ensure your clippers are charged and ready.
- Choose Your Guard Length: Select the guard size according to how short you want your cut.
- Start at the Back: Begin at the nape of the neck and work your way to the top. Make smooth, even passes to ensure an even cut.
- Go Over the Sides: Move to the sides, cutting from the bottom to the top.
- Final Touches: Go over any uneven spots and check with mirrors to ensure all sections are even.
Tips
- If you’re unsure about how short you want to go, start long and gradually go shorter.
- Use clippers with adjustable settings for more versatility.
Conclusion
The world of DIY haircuts is filled with opportunities for self-expression, creativity, and empowerment. These tutorials cater to different styles and preferences, allowing anyone to attempt a new look from the comfort of their home. Before you begin, take your time, equip yourself with the right tools, and cultivate a sense of adventure in your haircutting journey. Remember, practice makes perfect; the more you try, the better you will become!
Further Resources
If you want to delve deeper, consider looking into online platforms for additional tutorials or joining forums to share experiences and tips with others also venturing into DIY haircuts. The beauty of this trend lies in the community it fosters, as individuals encourage and inspire each other, proving that sometimes, the best salon is the one you create at home.
Footnotes:
[1] Johnson, A. (2021). Self-Care Trends in a Post-Pandemic World. Journal of Modern Wellness.


Add Comment