


Nailed It!: DIY Nail Art Ideas for Beginners
Nail art has become a fascinating realm of creativity, allowing individuals to express their personalities and styles through intricate designs on their fingernails. For beginners, diving into the vibrant world of DIY nail art can seem daunting, but it doesn’t have to be! This article is your comprehensive guide, filled with step-by-step suggestions, materials needed, and tips to ensure your nail art turns out fabulous. Get ready to unleash your inner artist!
Understanding the Essentials: Materials You’ll Need
Before delving into the design techniques, it’s essential to gather the requisite materials. Here’s a breakdown of what you’ll need:
1. Basic Nail Care Products
Maintaining healthy nails is crucial before you start decorating them. Here’s a rundown of essential products:
-
Nail Polish Remover: Acetone-based removers work effectively but may dry out your nails. Non-acetone options are gentler, perfect for regular use.
-
Base Coat: A base coat protects your nails from staining caused by pigmented nail polish and ensures that the polish adheres better.
- Top Coat: This not only provides a glossy finish but also prolongs the life of your nail art by protecting it from chipping and wear.
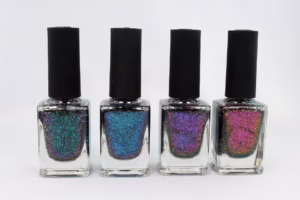
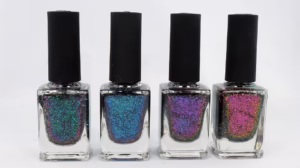
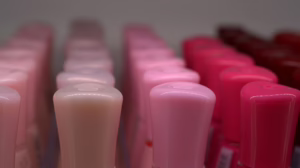
2. Nail Polishes
Invest in a variety of nail polishes. You can start with basic colors like red, black, and white, before expanding to shades that suit your style.
3. Nail Art Tools
Tools can make or break your nail art experience. Here’s a list of must-haves:
-
Dotting Tools: These come in various sizes and are great for making dots or intricate designs.
-
Nail Brushes: A fine-tipped brush can help with detailing and painting intricate designs.
-
Tape or Stencils: Painter’s tape can help create clean lines, and stencils can guide your designs.
-
Nail Vinyls: These reusable stickers help create patterns without fuss.
- Sponges: Great for ombré effects and abstract art.
4. Extras
-
Rhinestones or Gems: These can add a touch of glam and sparkle to your designs.
-
Glitter: An essential for a festive look or just to add a pop of shine.
- Nail Art Pens: These pens make it easier to draw designs without clutter.
Basic Nail Art Techniques to Get You Started
Once you’ve gathered your materials, it’s time to start creating! Here we will explore four beginner-friendly techniques that will help you master the fundamentals of nail art.
1. Dots and Dots and More Dots
One of the easiest ways to add flair to your nails is through dot designs.
How to Create Dot Designs:
-
Step 1: Start with a clean and dry base coat. Apply a base color of your choice and let it dry completely.
-
Step 2: Use a dotting tool to dip into nail polish. Begin at the center of the nail and create a dot. Continue adding dots around it to form a pattern (think flowers, polka dots, or spirals).
- Step 3: Allow the design to dry and finish with a top coat for added shine.
Quick Tip: Vary the sizes of the dots for a more dynamic look!
2. Stripes and Lines
Stripes can offer a chic and sophisticated look without requiring advanced skills.
How to Create Stripes:
-
Step 1: After your base coat is dry, use painter’s tape or striping tape to mask off sections of your nails.
-
Step 2: Apply a contrasting polish over the exposed sections and carefully peel the tape away while the polish is still slightly wet for clean lines.
- Step 3: After everything dries, apply a top coat for a polished finish.
Quick Tip: Try diagonal lines or a zig-zag pattern for something more playful!
3. Ombre Effect
The ombre technique presents a beautiful gradient effect and is perfect for beginners.
How to Create an Ombre Effect:
-
Step 1: Apply a base coat and allow it to dry.
-
Step 2: Take a makeup sponge and paint two colors side by side. Dab it onto your nail, making sure to blend the two colors together.
-
Step 3: Repeat as necessary until you achieve your desired look.
- Step 4: Finish with a top coat to smooth out the texture.
Quick Tip: Use a light hand when dabbing for a more blended effect!
4. Stamping
Nail stamping is a fun way to create intricate designs and patterns with minimal effort.
How to Nail Stamp:
-
Step 1: Apply a base coat and let it dry.
-
Step 2: Using a stamping plate, apply nail polish to the design you want.
-
Step 3: Use a scraper to remove excess polish and press a stamper onto the image to pick it up.
-
Step 4: Press the stamper on your nail.
- Step 5: Seal with a top coat.
Quick Tip: Make sure the polish is not too thick, or it may not transfer well.
Creative DIY Nail Art Ideas for Beginners
Now that you’re familiar with the techniques, here are some specific nail art ideas to inspire your creations!
1. Floral Nails
A timeless classic, floral patterns are always in vogue.
How to Create Floral Nails:
- Use a dotting tool to create flower petals using a pastel color.
- Add a tiny dot in the center for the flower’s heart.
- You can create a flower bouquet or scatter them across the nail.
2. Marble Nails
The marble effect creates a sophisticated look.
How to Create Marble Nails:
- Apply a base coat in white or nude.
- Drop different colors of polish onto a surface, use a toothpick to swirl them together, then dip your nail in the marbled polish mix.
- Seal with a top coat.
3. Geometric Patterns
Geometric patterns provide a modern look.
How to Create Geometric Patterns:
- Use painter’s tape to create triangles, squares, or lines on your nails.
- Paint the exposed sections in vibrant colors.
- Carefully remove the tape for a striking design.
4. Glitter Gradient
This design is perfect for parties or special occasions.
How to Create Glitter Gradient:
- Start with a solid color base.
- Use a makeup sponge to apply glitter from the tip of your nail toward the base, fading as you go.
- Finish with a top coat to smooth out any unevenness.
Final Touches and Nail Care Tips
Once you’ve created your stunning nail art, it’s essential to care for your nails. Here are additional care tips:
- Regular Maintenance: Keep your nails trimmed and use cuticle oil to keep them healthy.
- Hydration: Drink plenty of water to keep your nails hydrated.
- Limit Soaking: Avoid soaking your nails in water for prolonged periods.
- Use Gloves: When doing household chores, wearing gloves can prevent chipping and damage.
- Moisturize: Regularly applying hand cream can help maintain skin health around your nails.
Conclusion
Creating beautiful nail art can be a fun and satisfying hobby for beginners. From simple dot patterns to intricate designs, artistic expression is only a nail polish away! Remember to practice, have fun, and don’t be discouraged by imperfections. It’s all part of the creative process!
With these ideas and techniques, you’re well on your way to saying, “Nailed it!” with every design you create. So gather your tools, let your creativity flow, and enjoy the beautiful journey of DIY nail art!
Modern Footnotes:
- Nail Art Techniques for Beginners. Retrieved from [source]
- Essential Products for Nail Art. Retrieved from [source]
- How to Create Ombre Nails. Retrieved from [source]
- The Art of Nail Stamping. Retrieved from [source]
- Nail Care Tips for Long-lasting Designs. Retrieved from [source]
- Different Nail Art Designs. Retrieved from [source]


Add Comment